


Recently, I took up an interest in photography. It was spurred by the fascination of capturing moments and the ability to print it. I used to take pictures, but only with my phone. When I printed some of them last year, I was both happy and sad. Happy to see a lot of great results, but sad to see blurs, bad exposures, and grainy results. In the end, I procured a mirrorless camera that’s easy to use, that’s not expensive, and that has a lot of lens selection for the future.
I ended up choosing the Sony A6000 + Kit Lens + f1.8/35mm lens. This writing serves me as a reminder to the key basic learning points of photography that I learned within my first 6 months with the camera that helped me take better photos.
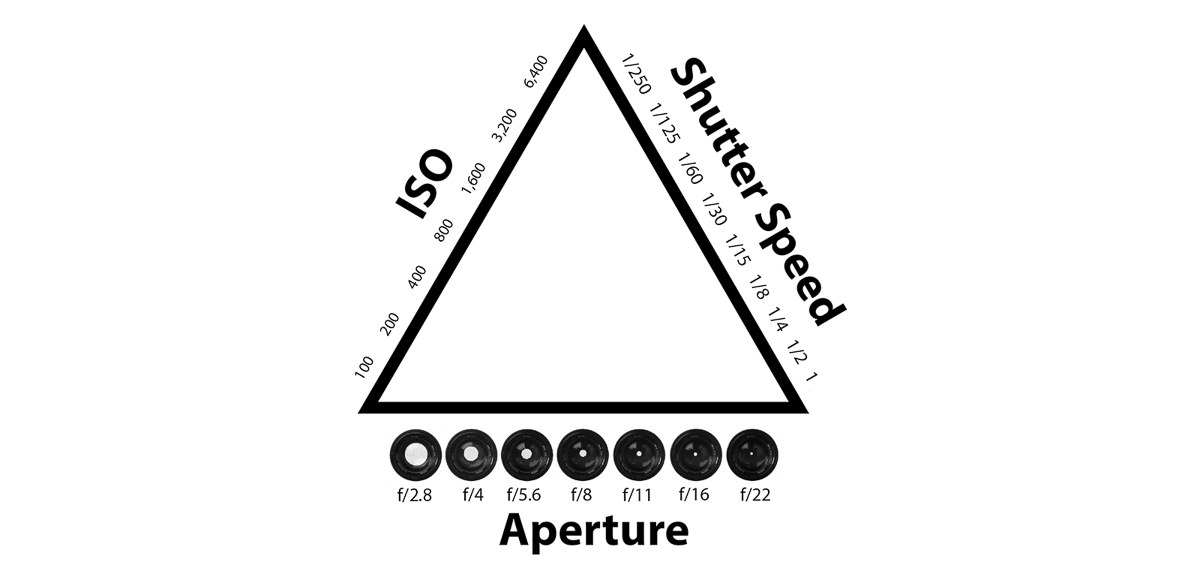
The image below perfectly captures the first thing I learned about camera, understanding all the damn newfangled numbers on the camera screen! A quick explanation on what these are:
- ISO – how sensitive the film/sensor is in capturing light. This setting impacts noise & sharpness. The lower the ISO, the less sensitive it is.
- Aperture (F-something) – how much light goes through the lens. It impacts amount of light & depth of field. The smaller the number, the larger the aperture. The depth of field effect can create the so-called “bokkeh”
- Shutter Speed – how long the light will be exposed to film/sensor. A low shutter speed freezes movement, while a high shutter speed gives a movement effect in the photo. The faster it is, the more light is required in the photo. The rule of thumb to avoid shaking is to use 1/Focal length. For example, if you use a 50mm lens, then use 1/50 shutter speed. The photograph I put as the featured image on this post is taken with a 30s shutter speed where you can see the coffee staff people’s movements.

Of course, all 3 have impacts to one another, which is captured by the Exposure Triangle below. If one of the variable changes, at least one other should also change to maintain a good exposure. Source : PhotographyLife
The next important part is about photo composition. In photography, composition is used to guide the viewer’s eyes towards the most important elements of the photo. A few basic techniques includes:
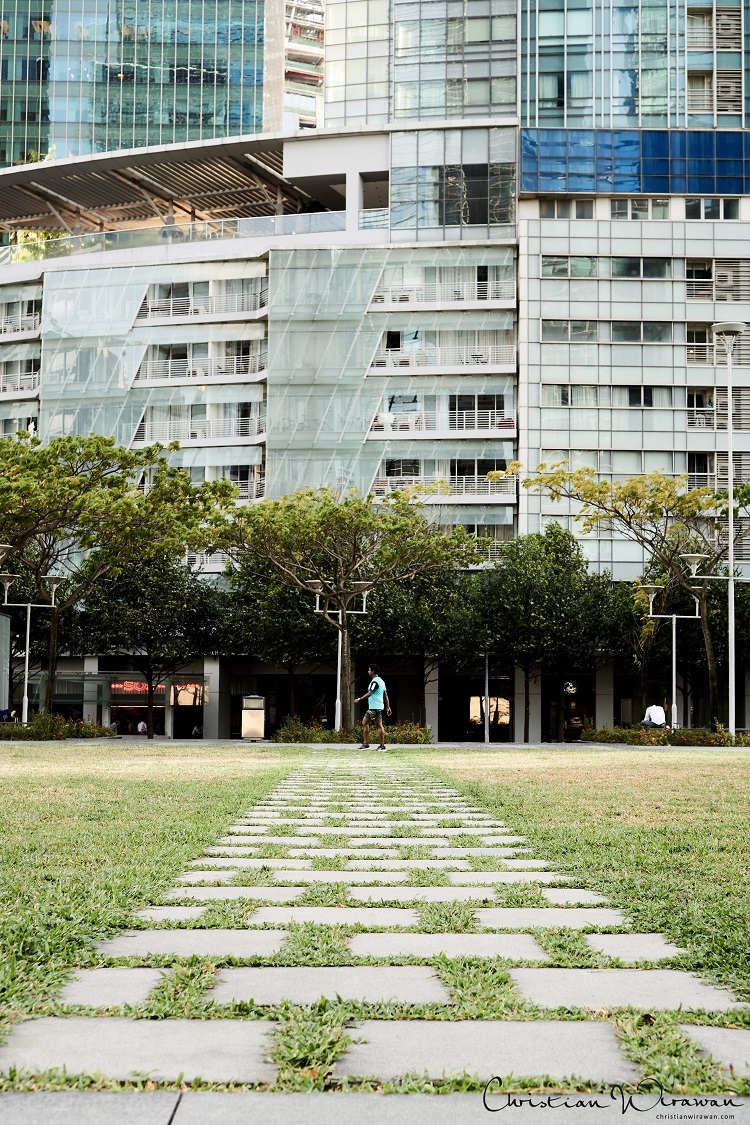
- Leading lines – A leading line paves an easy path for the eye to follow through different elements of a photo. Usually they start at the bottom of the frame and guide the eye upwards and inwards, from the foreground of the image to the background, typically leading toward the main subject. Sample that I’ve taken that utilizes this below.
- Depth of field – Bringing a 3 dimensional feel to a 2 dimensional media
- Symmetry & patterns:
- Symmetry – the creation of an image which can be separated into two equal parts (this can be horizontally or vertically). Both of the separate parts of the image should then look same, or if not the same should look similar. This can also be seen from the above picture that left and right elements are roughly the same.
- Pattern – repetition of an element in a photograph. This element could refer to anything; whether it is natural or manmade. This is enhanced by the fact that thought-provoking Patterns can occur when solid graphical elements such as shapes, colours, tones, and forms or lines continue to repeat themselves.
- Perspective/viewpoint – Changing elevation when you’re taking a picture such as by kneeling can change the feel and the sense you get from a picture. A great example in the article is if you were to photograph a young student being scolded at his desk, you would likely shoot the image from a higher viewpoint—from the vantage point of the dean or principal about to assign punishment—or you would chose the lower perspective from the student’s point of view with the towering power figure looming overhead.
- Framing – Technique of drawing attention to the subject of your image by blocking other parts of the image with something in the scene
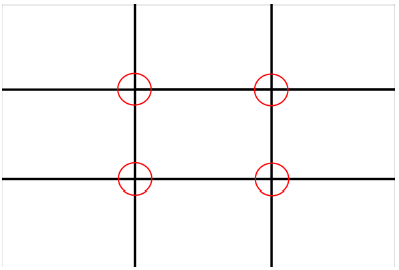
- Rule of third – Mentally dividing up your image using 2 horizontal lines and 2 vertical lines, as shown below. You then position the important elements in your scene along those lines, or at the points where they meet. You can turn on the option to show these lines like below in a typical digital camera.
As a buy recommendation for people who are interested to start on photography, I recommend to get a Mirrorless APS-C camera such as Sony A6000 or Fuji X-T20 and at least a tripod. After a few outings, I realized I needed a tripod to help capture movement with high shutter speed! So I procured a cheap one from Amazon to help.
Of course, with the advancement of cameras embedded in cell phones, we cannot discount the capability of phone cameras, there are a number of filters, pro mode, and apps to empower you to take great photos with your camera.
